Explore using Frog for CPD... Professional Development Platform
Sharing a Site
Once a site has been created you will at some point want other users to be able to view this site and possibly even help you to manage it. This is done through sharing your site with the desired users, groups or profiles.
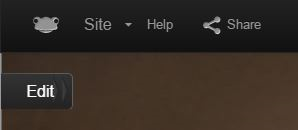
For the main method of sharing, open up the site which you wish to share with your users. Providing you are either the owner of the site, or have “Can Edit & Manage” privileges on the site you will see a “Share” icon on the top black navigation bar. This Share button will only show when out of edit mode.
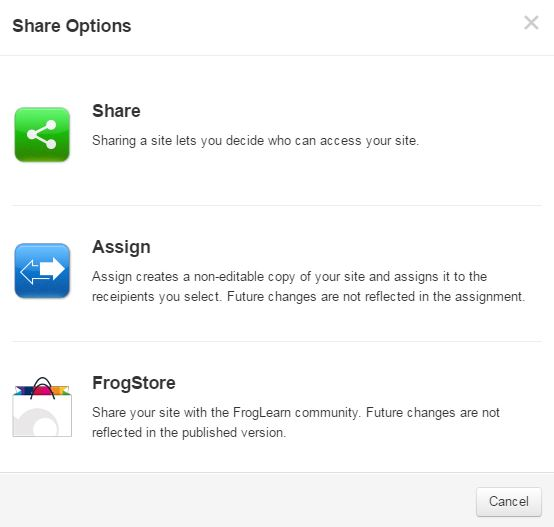
Once this is clicked you will be prompted with a popup window asking if you would like to “Share” or “Assign” the site or send it to the FrogStore. As you wish to allow your users to find and search for the site click “Share”.
Once “Share” is clicked you are then shown a list of the site tags that were previously set that can help users find your site within the FrogDrive area. In the FrogDrive area under "Sites" there are different categories such as Curricular, Extra-Curricular and Pastoral that can help you to organise your sites. Please note that even with tags present for a site, if users haven't had the site shared with them they still won't be able to view these sites within the FrogDrive area.
You are able to click the dropdown menus to add specific tags. You are also able to add Keywords to help users find your site. Keywords allow users to find your site easier using the global search box on the top black navigation bar. As a teacher, we advise to add a keyword of your name (e.g. "mrclementson" or "mr clementson") so a user can type in your name into the global search box to view this site from the list for easy access (remember it needs to be shared with them first though.)
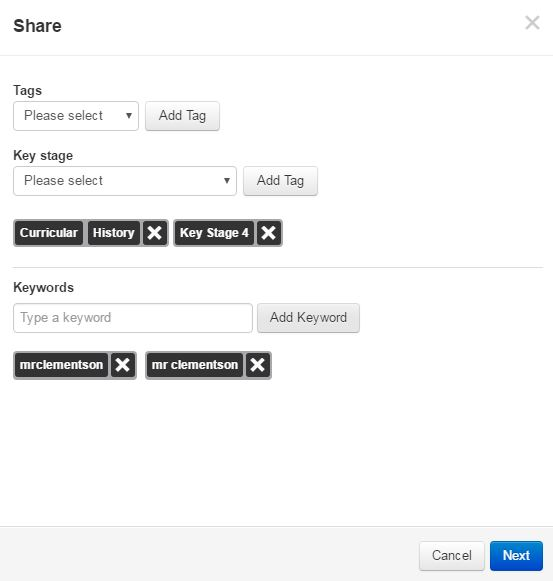
Once you are happy with your tags click the “Next” button to continue.
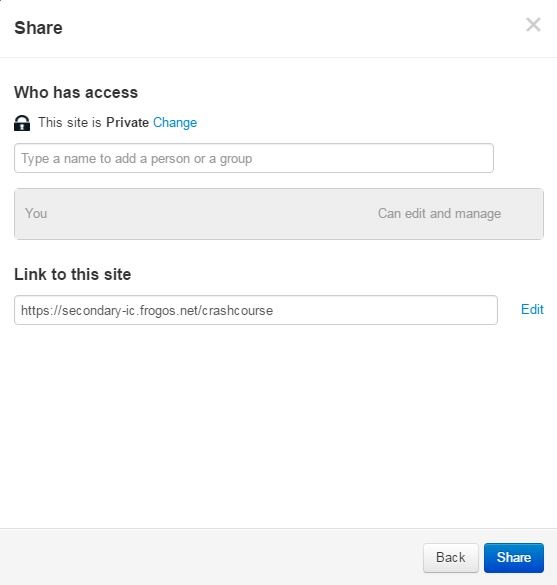
The next screen allows you to select which users or groups will have access to the site along with the permissions attributed to them.
You can choose the overall site settings by clicking “Change” just underneath “Who has access”.
You will then be shown additional sharing settings where you can choose from “Private”, “Public in the school” or “Public on the web”. See screenshot for explanations of these permission types.
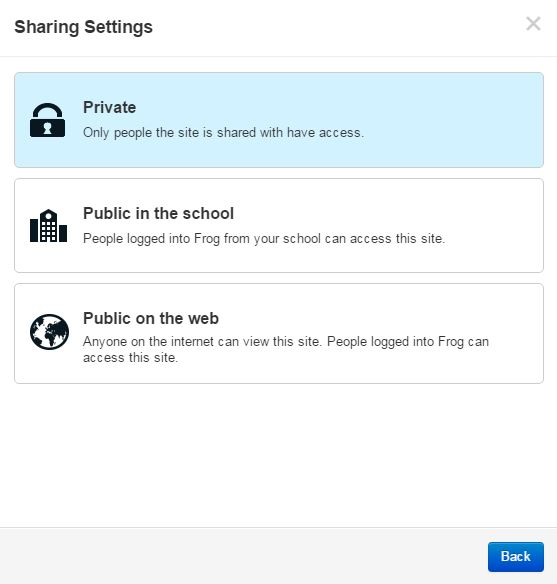
Click the option you wish to use and you will be taken back to the main Sharing menu.
In the main Sharing menu you will be able to view any existing groups that this site has been shared with. You are then able to type into the text box the name of the user, group or profile that you wish to have additional permissions for this site. You can start typing the name and a list of suggestions will be displayed depending on your search term entered.
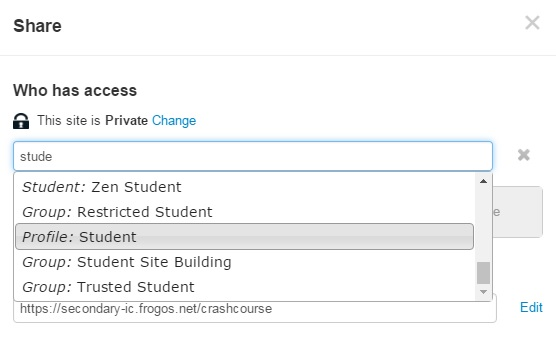
Once you find a user or group in this list you can click on the result and it will be added to the permissions list below. If you select a group or profile you can click "convert to individuals" which will remove the group or profile entry and instead list every user individually.
Once a group has been selected you are then able to select the desired permissions for that group using the dropdown menu beside that entry. The available permissions are:
- Can view
Users will be able to search for and access this site. They will be able to view the content available on these page but not contribute towards any widgets that require input.
- Can contribute
Users will be able to search for and access this site. They will be able to view the content available on these page and contribute towards any widgets that require input. For example the quiz, form, forum, wall etc.
- Can edit & manage
Users will be able to search for and access this site. They will be able to view the content available on these page and contribute towards any widgets that require input. In addition to this they will have the “edit” button and be able to share the site accordingly.
Once you have made the desired changes to permissions, click “Share” to be taken back to the site and confirm your changes. You will see a notification appear in the top right of Frog which will disappear after a few seconds. This simply informs you that your changes have been saved.
Users who you have shared this site with will now be able to access the site by searching for it in the global search box on the top black navigation bar, finding it in the FrogDrive application under Sites (then depending on where you tagged it, in one of those areas) and finally by clicking a notification they will have received through the platform.
Tutorials in this series...
product hubs