Explore using Frog for CPD... Professional Development Platform
Send Media in Frog to a Timeline
This method explains how to send media already in Frog then using "Send Copy To" option. This options appears in 2 places. The first place is on a timeline (user timeline or site timelines widget) at the top right of each media item, clicking the cog icon revelas the "Send Copy To" function.
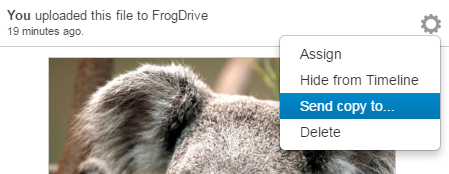
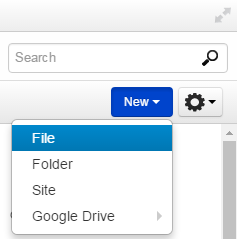
The second area is explained in more detail below. Firstly open up the FrogDrive application and navigate to the Documents area in order to upload files. To upload files click on the blue "New" button then click on "File" from the dropdown menu.
After clicking "File" you will be presented with the file uploader window. Here you can either click "Choose Files" to select a file (or multiple files) to upload to FrogLearn. Alternatively you can drag and drop a file from your local machine into the clearly labelled drag and drop area.
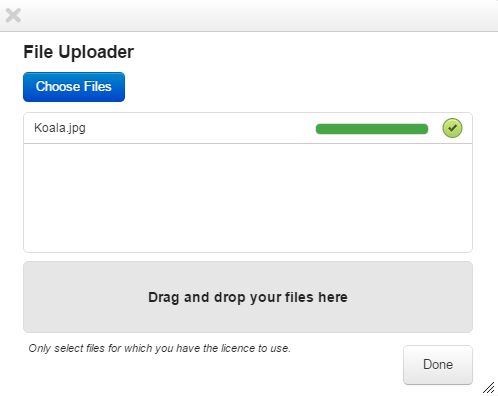
Once the file has uploaded, providing it has been successful the progress bar will turn green. Click "Done" to be returned to the FrogDrive window with your uploaded files present.
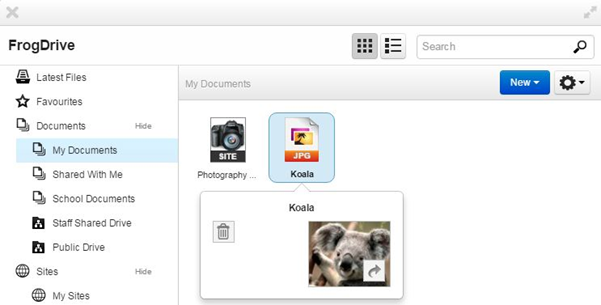
Once uploaded, single left click a photo/file you wish to send to a site. Once selected, click on the cog icon towards the top right then click the "Send Copy To" option. This option can also be found on the user timeline beside uploaded media and also on the site timeline widget in a site itself.
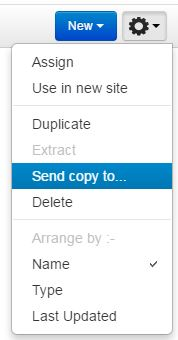
After clicking "Send Copy To" you will be presented with the following dialogue window, allowing you to search for a user, group or profile to send this file to.
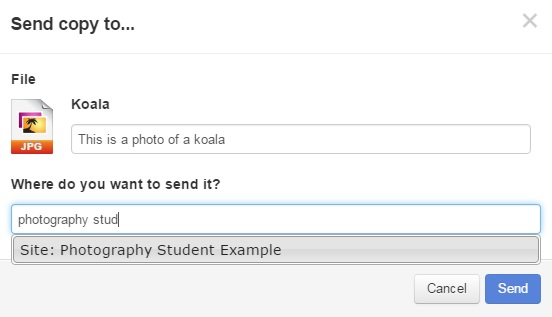
You can firstly add a description to the file if you like but more importantly there is a text box where you need to type in the exact name of the site you are wanting to send the image too (you can also type in a users name or group/profile name to send it to users). Once you've typed in the name of the site it will show in the list below, single left click to select this and you will see the name of the site in the selection area below.
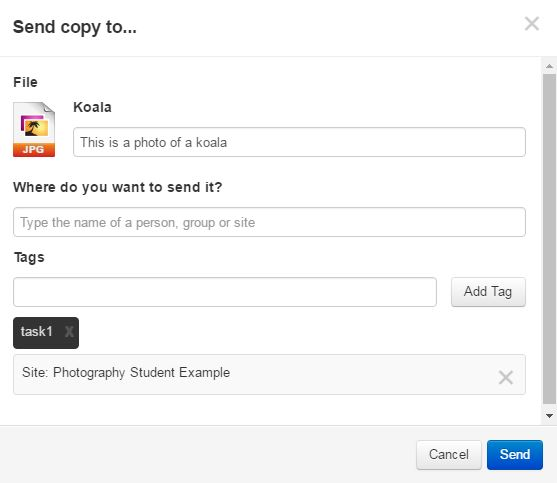
Once you've selected the site, you can then add "tags". Tags can be important as they define which site timeline or photo stream widget they will be shown in when accessing a site. You can send a file to a site that does not contain these widgets. The file will not be present in any way but will sit in the background attached to the site as a site asset until a widget is used that displays this file. If no tag is selected the photo will show in any site timeline/photo stream widget that has not had a tag defined. For example if you want a photo to appear in a specific Site Timeline widget within a site you must match the keyword tags for this widget. In the example here "task 1" has been used in a Site Timeline widget.
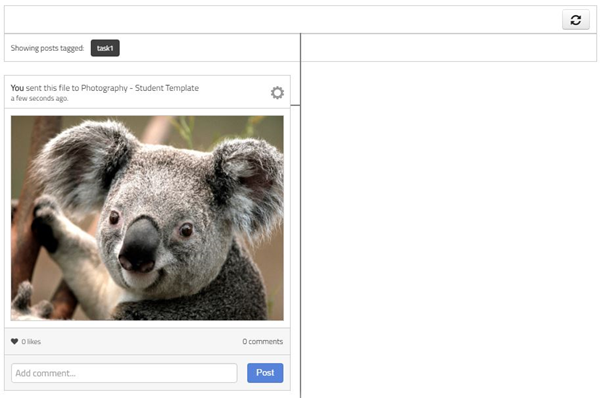
Please Note: If you send a photo to the incorrect timeline, you can click the "cog" at the top right of the photo then click "edit" to alter the description and tag.

Tutorials in this series...
product hubs
Product updates
